Train Your Own AI in Scratch with Image Trainer
Train your own image-recognition model in Scratch using hand gestures or objects, then use your trained commands to control Pishi and catch the Mouse.
Difficulty
INTERMEDIATE
Estimated Time
40–50 MINUTES
Extension
IMAGE TRAINER
📖 What You Will Learn
- How to create and name Image Trainer labels
- How to train an AI model with your own examples
- How to use hand gestures or objects as visual commands
- How different training examples affect recognition
- How to use detected labels to control a Scratch sprite
- How to add extra training when a command needs improvement
- How to reset, save, and load your trained model
- Left
- Right
- Up
- Down
- No command
🧰 What You Need
- A computer or laptop with a camera
- Pishi.ai Scratch (start a new project)
- Image Trainer extension (view the help guide)
- Pishi sprite
- Mouse sprite
- A hand gesture or object for each command
You will also use these variables:
- score
- time
- train done
- counter
- number of trains
For better training, use good lighting and a simple background.
🛠️ Build Your Project
1. Set Up the Five AI Labels
When the green flag is clicked, first check whether Pishi has already been trained.
If train done = 0, introduce the training:
“Hi! Before we play, you need to teach me your commands.”
“I’ll learn five commands: left, right, up, down, and no command.”
Then name the five Image Trainer labels:
- Label 1: Left
- Label 2: Right
- Label 3: Up
- Label 4: Down
- Label 5: No command
During trainin, the project also shows a few useful tips:
- Keep the command clearly visible.
- Use good lighting and a simple background.
- Use either a hand gesture or an object.
- Keep unnecessary objects or your body out of the camera view.
- Move the command around the camera view.
- Show it at different distances from the camera.
These variations help the AI learn the command in more than one position or size.

2. Train All Five Commands
Set counter to 0, then repeat five times:
- Increase counter by 1
- Run train label (counter)
This trains all five labels one after another.
The custom train label (number) block first checks whether that label already contains training data.
If it does, Pishi warns:
“This label already has training data. To start over, press the R key and confirm to reset all trained labels.”
Otherwise, Pishi announces the current command:
Teach me: (name of label)
After a short countdown, the project collects 20 training samples.
Use the training tips from the previous step while Pishi collects the samples.
For No command, simply remove the movement gesture or object and show the normal camera view.
After each label is finished, Pishi says:
I learned: (name of label number)
When all five labels are complete:
“Great! Training is complete.”
Then set:
train done to 1

3. Start the Game
After training, set:
time to 0
and broadcast:
Start Game
If Pishi has already been trained, the project skips the main training cycle and says:
“I already know your commands. Let’s catch the Mouse!”
It also reminds the player:
“To train me again, press the R key and confirm to reset all trained labels.”
This allows the player to return directly to the game without retraining every time.

4. Control Pishi with Your Trained AI
During the game, Image Trainer continuously checks the camera and reports the current: detected label name
Use it to control Pishi:
- Left: change x by -10
- Right: change x by 10
- Up: change y by 10
- Down: change y by -10
- No command: no movement
Instead of pressing keyboard controls, the player now moves Pishi using the visual commands they trained themselves.

5. Catch the Mouse
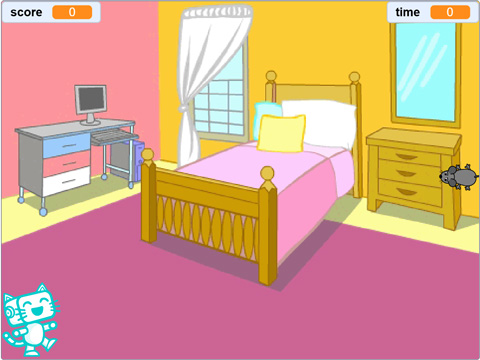
When the Mouse receives Start Game:
- Set score to 0
- Move to a random position
- Reset the timer
The game continues for 20 seconds.
Whenever Pishi touches the Mouse:
- Increase score by 1
- Play a sound
- Move the Mouse to another random position
- The Mouse continually points toward Pishi while the timer is copied into the time variable.
When the timer reaches 20 seconds:
- Set time to FINISH
- Play the ending sound
Pishi stops moving, returns to its starting position, and says:
“Time’s up!”

6. Improve, Reset, Save, or Load the Model
The first training cycle gives every label 20 samples, but some commands may still need extra examples.
For this, create the custom block: train one sample (number)
Connect it to these keys:
Left Arrow for Label 1, Right Arrow for Label 2, Up Arrow for Label 3, Down Arrow for Label 4, and the 0 key for Label 5
If one command is not recognized reliably, show that command clearly and press its key a few times to add more training examples.

You can also manage the complete trained model:
- R: Reset all labels and train again on the next run
- S: Save learning data
- L: Load previously saved learning data
This lets you improve the model only when needed instead of repeating the full training cycle.

🚀 Try Your Project!
Click the green flag and allow access to the camera.
Choose how you want to represent each command.
You might use:
- Different hand gestures
- Colored cards
- Small objects
- Printed symbols
Train Left, Right, Up, Down, and No command.
When training is finished, use your commands to move Pishi around the Stage and catch as many mice as possible before the 20-second timer ends.
If one command is difficult to recognize, add a few extra samples and try again.
🤖 How Does It Work?
Normally, a Scratch program might say:
if Left Arrow key pressed: move left
In this project, you do not directly tell Scratch what a Left command looks like.
Instead, you show the AI several examples.
The process is:
Show examples
↓
Train the labels
↓
Show a new camera image
↓
Image Trainer predicts the closest label
↓
Scratch reads the detected label
↓
Pishi moves
This means the behavior of the project depends not only on the Scratch code, but also on the training data you provide.
That is one of the key ideas behind machine learning.
💡 Make It Better!
- Create Your Own Visual Controller
Customize the AI controller by replacing the original commands with your own gestures, objects, or additional labels.For example, you could use colored cards for movement commands or add new actions such as Jump, Stop, Spin, Teleport, or Speed up.
Then connect each trained label to the action you want Pishi to perform.
- Experiment with Training Data
The examples you provide affect how well the AI recognizes commands.
Try training the same command in two different ways:
First, use very similar examples by keeping your hand or object in the same position and distance.
Then, reset the model and train again with more varied examples:- Move it to different parts of the camera view.
- Show it closer and farther from the camera.
- Change its angle slightly.
Test both models and compare how reliably they recognize the command.
This helps you understand an important machine-learning idea:
Better and more varied training examples can help an AI model recognize new situations. - Add Obstacles
Add another sprite that should be avoided.
For example:- Mouse: +1
- Cat: -1
Now the player must use the AI controller more carefully.
- Build Another AI-Controlled Game
The same idea can be used to create:- A racing game
- A maze
- A spaceship controller
- A paddle game
- A robot challenge
Once you understand how to train labels and use detected label name, you can use Image Trainer as a custom visual controller for many different Scratch projects.
🔗 Share Your Creation
Finished your project?
Save your learning data, remix the Scratch project, or create your own game using completely different visual commands.
Try giving the project to a friend and see whether they can train their own AI controller.